


| Bookmark Name | Actions |
|---|
Designing an inflow with PW
Read this topic to learn how to design an inflow when it is based on a process definition.
Procedure
-
Right-click the Designs folder and select T24 Inflow Design Wizard.

-
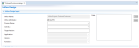
Enter a name for the Inflow and select Finish the open the Designer.

The Inflow Design page opens.
-
Check Use PW. This enables the Process Name, Activity and Target Version combo boxes.
-
From the Process Name box, select the process name.
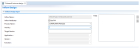
The available activities for this process are now listed in Activity.
-
Select the Activity. The version available in the target field of the activity is now displayed in Target Version.
In Fields the fields from the underlying Transact object are displayed. Fields listed here are those defined as editable in STANDARD.SELECTION.
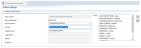
- Select the fields to be added and then click Add.
This list has only editable fields in Transact based on the STANDARD.SELECTION definition.

-
Follow the above steps for adding all the required activities.


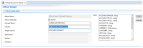
When a field is selected from the fields list, a read-only text box below Field table will show any enrichment (or mapping) defined for the field. To understand the mapping definition, see the Process Orchestration user guide. For example the above screenshot shows the mapping as C,&&SOURCE.KEY&& ==> NR,ACCOUNT,CUSTOMER. This means that the @ID of CUSTOMER is to be mapped to the CUSTOMER field of ACCOUNT. This example does not have any conversion.
The enrichment is provided with the following pattern: Extraction > Conversion > Placement.
After you add the Mapping field to the Field Enrichments table, a warning appears indicating that the selected fields have mapping. Process Workflow allows you to pass values in the request even though the field has a mapping. In that case, the value passed will take precedence over the mapping.
 NOTE:
NOTE:When you look into the fields list you can see that the following data types are introduced. This allows you to enter a value that is supported by Transact and by the underlying XML data type.
Data type
Description
t24Currency
It is used for currency fields to restrict the input to 3 alphabetic characters. This accepts - and |-| to support the Transact data removal identifier.
t24Date
It is used for IN2D fields. It accepts XML Date, - and |-| to support valid XML data and a Transact data removal identifier.
t24Decimal
It is used for IN2 fields. It accepts decimal values, - and |-| to support valid XML data and a Transact data removal identifier.
The column isMandatory is either marked as mandatory (Y) or optional (N) based on the STANDARD,SELECTION definition. You can change this.
Inflow requires that all fields marked as mandatory in Transact contain data, otherwise the request will fail. If a field is marked as mandatory in Transact and optional in Inflow, it is the responsibility of the inflow developer to ensure this field contains data in the inflow request or mapped using the functionality available in Transact.
-
Repeat the above steps to add all the required activities.

-
Save your changes.
- Publish the inflow. For more information, see Publishing inflows to Transact.
Add Bookmark
save your best linksView Bookmarks
Visit your best links BACK
BACK


Are you sure you want to log-off?