| Bookmark Name | Actions |
|---|
Configuring the WebLogic application server for Relational Replication
You will need to perform a number of steps to configure the WebLogic application server for Relational Replication.
Configuring the WebLogic Managed Server
Procedure
-
Select Domain Structure > Environment > Servers.
A list of admin servers is displayed.
-
Select the server on which Relational Replication will be deployed.
-
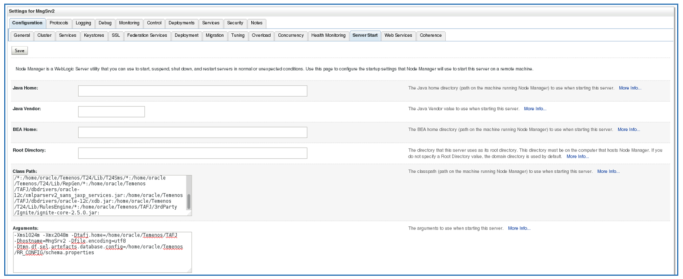
Click Server Start.
-
In the Classpath enter the required TAFJ jar files and Oracle database server files (with their respective paths). Seperate each entry with a colon :.
For example:
/home/oracle/Temenos/TAFJ/home/oracle/Temenos/TAFJ/lib/TemenosSecurity.jar:/home/oracle/Temenos/TAFJ/lib/TAFJCommon.jar:/home/oracle/Temenos/TAFJ/lib/cache-api.jar:/home/oracle/Temenos/TAFJ/lib/TAFJCache.jar:/home/oracle/Temenos/TAFJ/lib/TAFJCompiler.jar:/home/oracle/Temenos/TAFJ/lib/TAFJCore.jar:/home/oracle/Temenos/TAFJ/lib/TAFJLocking.jar:/home/oracle/Temenos/TAFJ/lib/TAFJLogging.jar:/home/oracle/Temenos/TAFJ/lib/TAFJVersion.jar:/home/oracle/Temenos/TAFJ/lib/TAFJClient.jar:/home/oracle/Temenos/TAFJ/lib/log4j-api.jar:/home/oracle/Temenos/TAFJ/lib/log4j-core.jar:/home/oracle/Temenos/TAFJ/lib/disruptor.jar:/home/oracle/Temenos/TAFJ/ext/TAFJBASIC.jar:/home/oracle/Temenos/TAFJ/ext/tComponentFramework.jar:/home/oracle/Temenos/T24/Lib/LocalDev/*:/home/oracle/Temenos/T24/Lib/GPack/*:/home/oracle/Temenos/T24/*:/home/oracle/Temenos/T24/Lib/T24Email/*:/home/oracle/Temenos/T24/Lib/T24Sms/*:/home/oracle/Temenos/T24/Lib/RepGen/*:/home/oracle/Temenos/TAFJ/dbdrivers/oracle-12c/xmlparserv2_sans_jaxp_services.jar:/home/oracle/Temenos/TAFJ/dbdrivers/oracle-12c/xdb.jar:/home/oracle/Temenos/T24/Lib/RulesEngine/*:/home/oracle/Temenos/TAFJ/3rdParty/Ignite/ignite-core-2.5.0.jar:
-
In the Arguments section, enter the following parameters with their values.
-
The minimum and maximum heap sizes for the Java virtual machine.
-
The TAFJ home path.
-
The target managed server where the Relational Replication aplications are deployed.
-
Encoding.
-
The path to the schema.properties file.
For example:
-Xms1024m -Xmx2048m -Dtafj.home=/home/oracle/Temenos/TAFJ -Dhostname=MngSrv2 -Dfile.encoding=utf8 -Dtmn.df.sel.artefacts.database.config=/home/oracle/Temenos/RR_CONFIG/schema.properties
-
Configuring data sources in the WebLogic Admin Console
Use the following procedure to create the following data sources, which are required for Relational ReplicatIon configuration.
| Data Souce | What the URL should point to |
|---|---|
| jdbc/confDataSource | The CONFIG schema in the Relational Replication database. |
| jdbc/metaDataSource | The MDATA schema in th Relational Replication database. |
| jdbc/selDataSource | The RR schema in th Relational Replication database. |
| jdbc/t24DS | The Temenos Transact database. |
Procedure
-
From the Domain Structure menu, select the Service option.
-
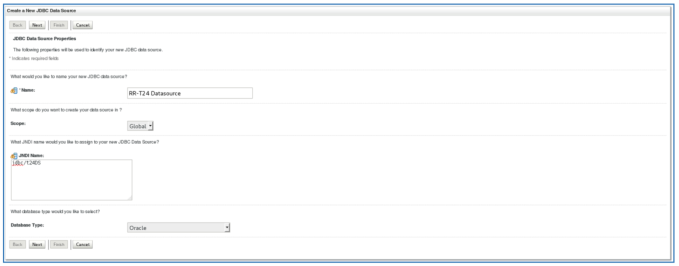
Select Service -> Data Sources -> New -> Generic Data Source.
-
In Name enter enter the name of the data source.
-
In JNDI Names enter the JNDI name.
Refer to the above section for data source and JNDI names.
-
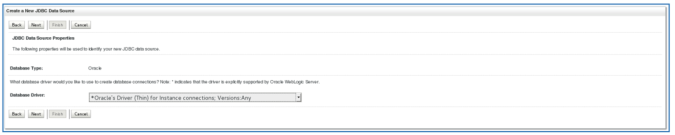
Select the relevant database driver. Note that all the four Datasources required for Relational Replication should have Non-XA Driver configuration.
-
Choose the below mentioned Driver Name from the dropdown list and click Next.
*Oracle's Driver (Thin) for Instance connections; Versions:Any
-
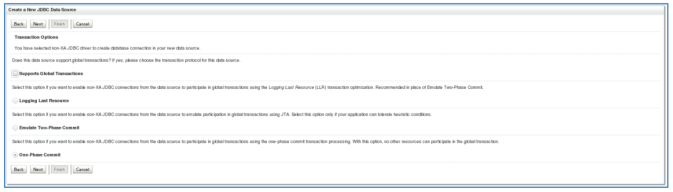
Uncheck Supports Global Transactions.
-
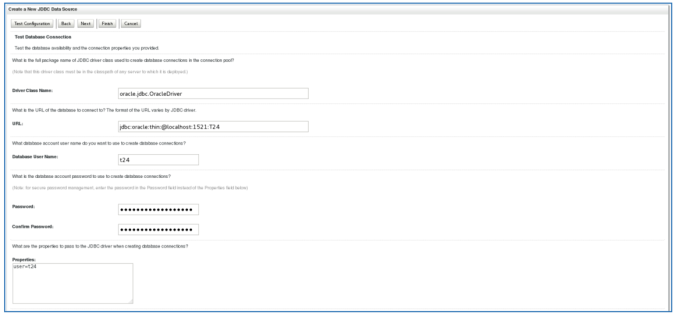
Enter the respective database details. An example is illustrated below.
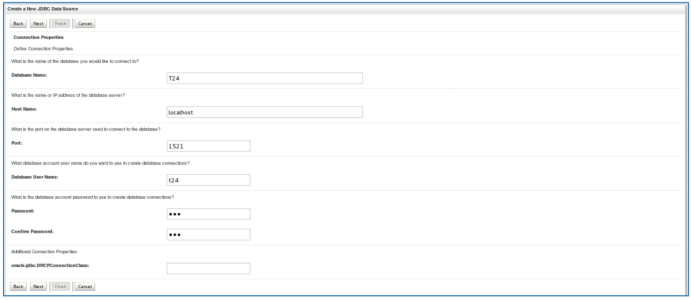
The database details just entered will now be displayed.
-
You will need to define the Maximum Capacity for each datasourace to connect to the corresponding schema in the target database. Set the values as in the table below:
Datasource Maximum Capacity value jdbc/confDataSource 120 jdbc/metaDataSource 20 jdbc/selDataSource 120 jdbc/t24DS 120 -
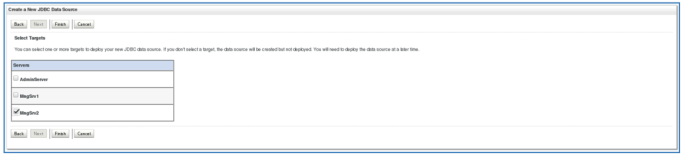
Select the target server and click Finish to complete the datasouce configuration.
-
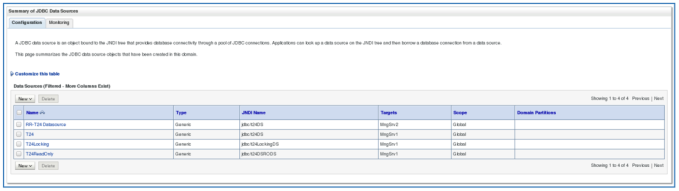
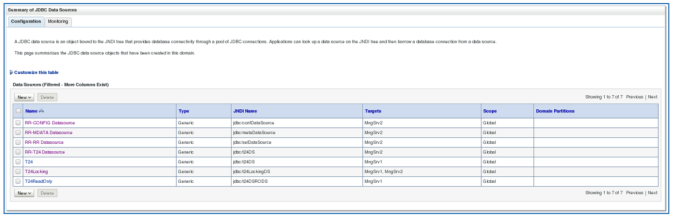
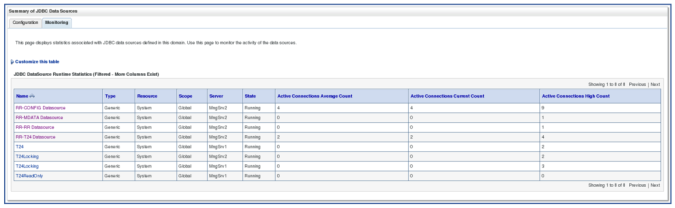
Click the Configuration tab and click Summary of JDBC DataSources. You can now see the newly configured datasource displayed in the list.
-
When you have created all for datasources, they should be available under the Configuration tab.
-
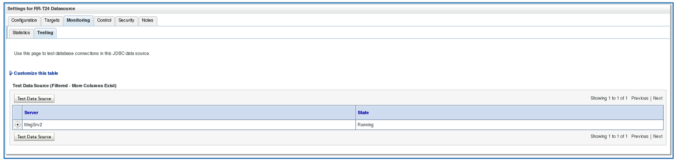
After configuring all the datasources, you must test the connection. Select Domain Structure > Services > Data Sources.
-
Select the Monitoring tab and click Test Data source.

-
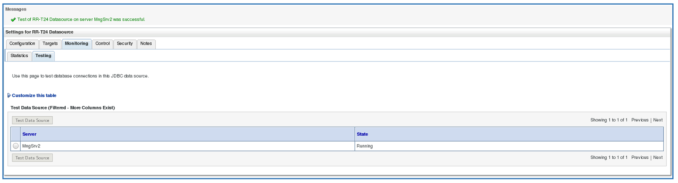
The test connection for the respective datasource should be successful.
-
You must test the connection for all configured Relational Replication data sources. Select the Monitoring tab. They should all be displayed with a State of Running.
Deploying Relational Replication applications in the WebLogic Admin Console
Procedure
-
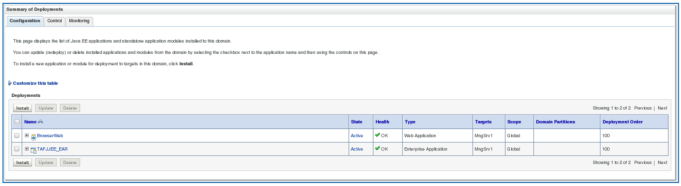
Select Domain Structure > Deployments.
-
Select the Configuration tab.
-
For each of the following Relational Replicaton EAR files, select the file and then click Install.
-
rr-config-xxxxxx.x.x.ear
-
rr-etl-xxxxxx.x.x.earxxx
-
rr-purge-xxxxxx.x.x.ear
-
-
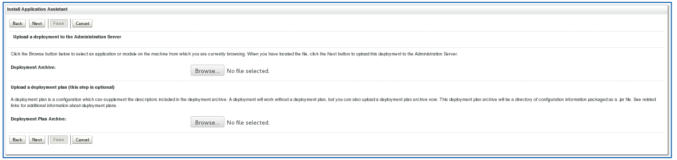
Click Upload your files(s).
-
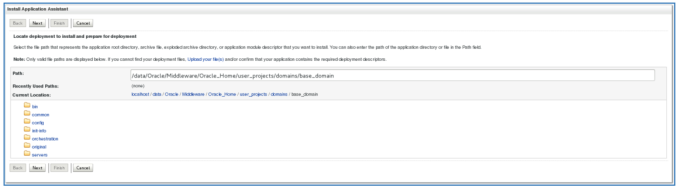
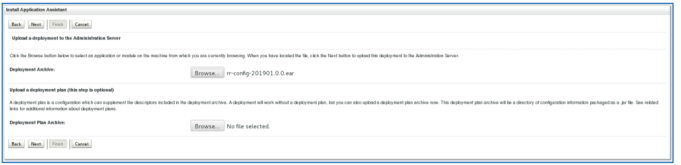
Against Deployment Archive click Browse.
-
Browse to the Relational Replication EAR file to be deployed and click Open. In the example below, it is rr-config-201901.0.0.ear.
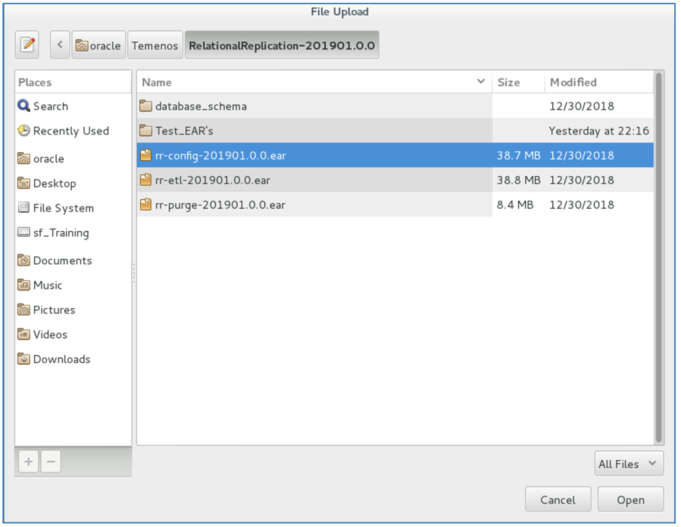
The selected file will now be displayed before the upload.
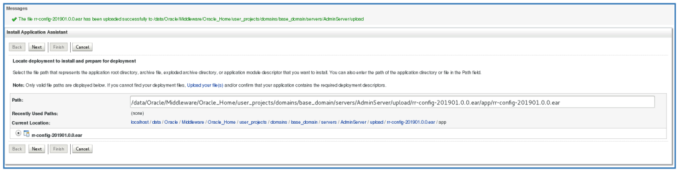
-
The fact that the file has been uploaded successfully is now indicated on the screen. Click Next.
-
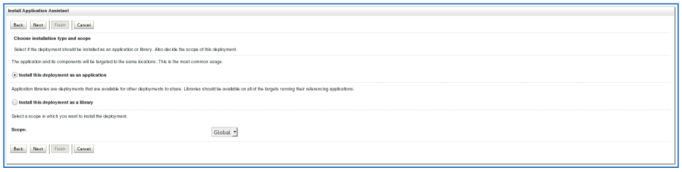
Select Install this deployment as an application and click Next.
-
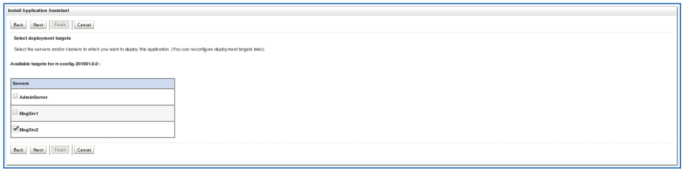
Select the target server on which the deployed EAR file is to be run and click Next. In this example, the server is MngSrv2.
-
On this screen no changes are required. Click Next.
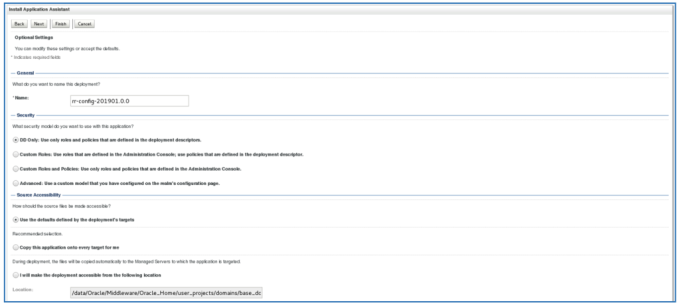
-
On this screen no changes are required. Click Finish.
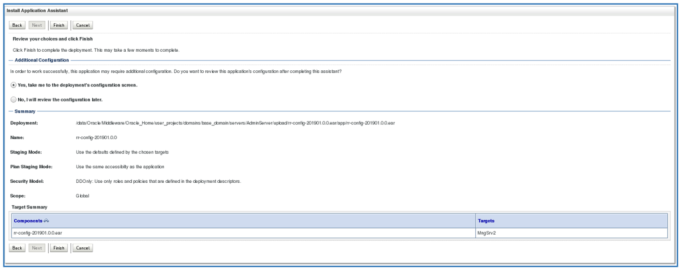
-
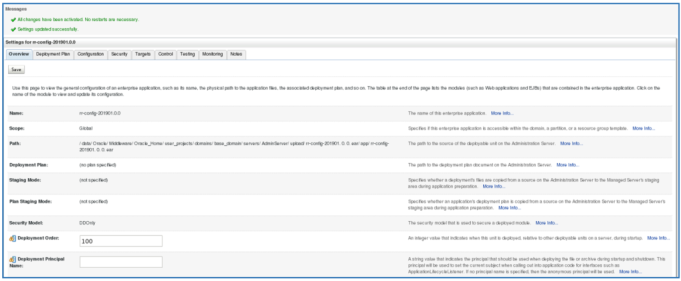
Click Save.
The screen will now indicate that all changes have been activated and that the settings have been uploaded successfully.
-
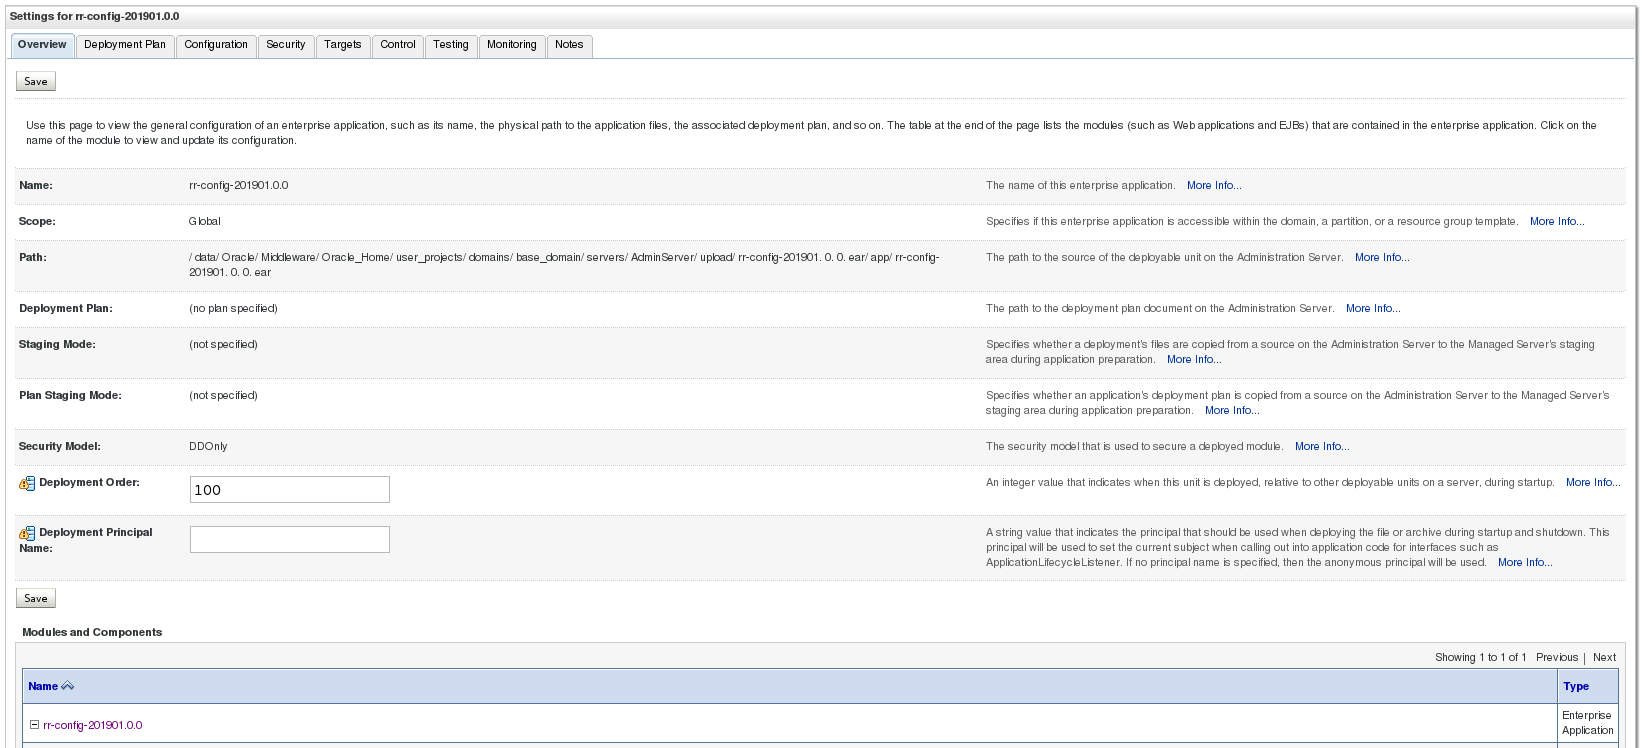
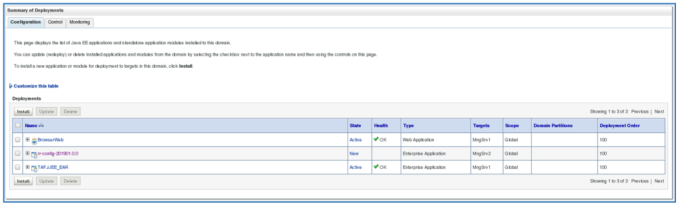
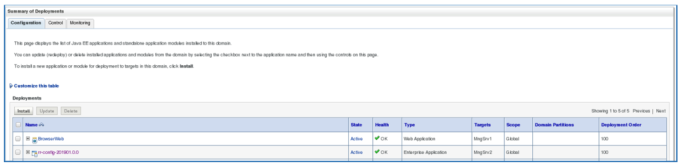
In Summary of Deployments, click Configuration. You should see all the EAR files displayed.
-
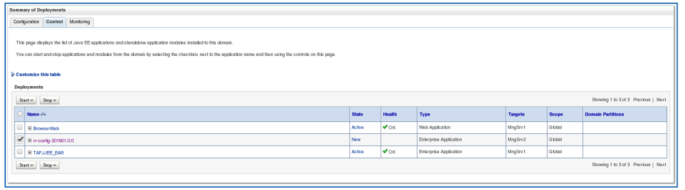
Select the Control tab. Select one of the EAR files and click Start.
-
Select the Configurations tab. The State should be Active and the Health should be OK.
-
Follow the same procedure to deploy the other EAR files.

Add Bookmark
save your best linksView Bookmarks
Visit your best links BACK
BACK


Are you sure you want to log-off?